How to Plan a Bathroom Layout: A Step-by-Step Guide
Master Your Bathroom Layout: A Step-by-Step Planning Guide
Embarking on a bathroom renovation is an exciting journey that can transform your home. The cornerstone of a successful project isn’t your first tile choice—it’s a meticulously planned bathroom layout. A thoughtful bathroom layout is what separates a cramped, dysfunctional space from a serene, efficient oasis. Whether you’re redesigning a spacious master suite or a compact powder room, this guide from Artworx Bathrooms will walk you through the essential steps to create the perfect bathroom layout for your needs.
Step 1: Measure Your Space & Create a Scale Drawing
Every great bathroom layout starts with precise measurements. You can’t plan effectively without understanding your space’s exact dimensions.
- What You’ll Need: A tape measure, graph paper, and a pencil (or a digital tool like SketchUp).
- What to Measure: Record the room’s overall length and width. Then, meticulously note the location of every fixed element:
- Door(s) and their swing direction
- Window(s) and their sill height
- All plumbing lines (drain, water supply, vent stack)
- Electrical outlets, switches, and light fixtures
- Ceiling height
Transfer these to a scale drawing (e.g., 1 square = 1 foot). This “as-is” blueprint is your foundational document for all subsequent bathroom layout decisions.
Step 2: Understand Clearance Codes and Standards
This technical step is non-negotiable. Building codes ensure safety, while standard clearances guarantee comfort. Ignoring these is a primary cause of a poor bathroom layout.
- Toilet: Plan for at least 21 inches of clearance in front (30 inches is comfortable). Allow 15 inches from the toilet’s center to any side wall or obstacle.
- Shower/Tub: Provide a minimum of 24 inches of clear space in front of the entry.
- Vanity/Sink: Allow at least 30 inches of space in front for movement (36 inches for walkways).
- Door Clearance: Ensure the door swings freely without hitting any fixture.
Pro Tip from Artworx Bathrooms: Always verify specific requirements with your local building department. A professional contractor will manage this for you, ensuring your bathroom layout is fully compliant.
Step 3: Position Your Core Fixtures
The toilet, shower/bathtub, and vanity form the anchor points of your bathroom layout. Their placement is often influenced by existing plumbing to control costs.
- The Toilet: Often placed first. For budget and practicality, try to position it near the existing soil pipe. Consider privacy by placing it least visible from the door.
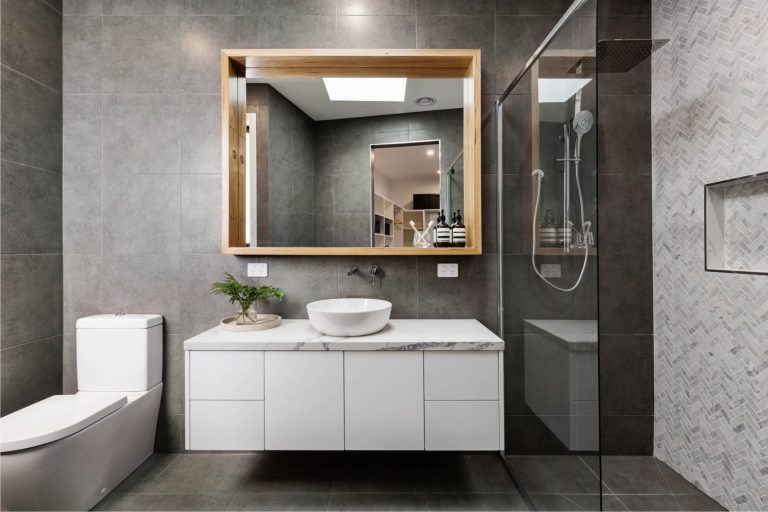
- The Shower/Tub: This is typically the largest fixture. Choose based on users—a tub/shower combo for families or a walk-in shower for a master bath. Corner placements optimize space in your bathroom layout.
- The Vanity: This focal point dictates style. Decide on size and sink count. A vanity opposite the door makes a visual statement, while a floating vanity can open up a small room.
Step 4: Optimize Traffic Flow and Function
A superior bathroom layout creates intuitive, unobstructed movement. Think about daily use.
- Create Zones: Separate “wet” (shower/tub) and “dry” (vanity, toilet) zones. Use shower doors or glass panels to contain water.
- Avoid Door Conflicts: Ensure the door doesn’t block access to the vanity or toilet.
- Consider Shared Use: Can two people use the space comfortably? Is the toilet positioned for privacy in an ensuite?
Popular Bathroom Layout Configurations
Sometimes the best inspiration comes from classic, proven designs. Here are three fundamental bathroom layout types:
- The Three-Wall Layout: Ideal for larger spaces. Fixtures are placed on three separate walls, creating an open, balanced center.
- The Two-Wall Layout: A common, space-efficient design where fixtures are shared across two opposing walls, perfect for family bathrooms.
- The One-Wall Layout: The ultimate space-saver. All fixtures line a single wall, simplifying plumbing—ideal for powder rooms or small ensuites.
Step 5: Refine with Storage and Lighting
With your core bathroom layout set, integrate the elements that elevate functionality.
- Storage: Plan for medicine cabinets, vanity drawers, recessed shower niches, and linen towers. Built-in storage maximizes efficiency.
- Lighting: Use a layered approach: task lighting (vanity sconces), ambient lighting (ceiling fixture), and accent lighting (in-shower or for art).
When to Call a Professional for Your Bathroom Layout
While this guide prepares you to think like a designer, complex projects benefit from expert involvement. Consider partnering with Artworx Bathrooms if:
- You need to move major plumbing lines.
- Your space is particularly awkward or small.
- You’re adding a bathroom where one didn’t exist.
- You desire complex features like wet rooms or custom drains.
- You simply feel overwhelmed and want a seamless experience.
A professional designer can help you avoid costly errors, propose innovative solutions, and ensure your dream bathroom layout becomes a stunning reality.
Ready to Transform Your Bathroom Layout Plan into Reality?
If you’re inspired and ready for expert guidance, the team at Artworx Bathrooms is here to help. We specialize in designing and building beautiful, highly functional bathrooms tailored to our clients’ unique needs and homes.
[Schedule a Free Design Consultation] with our experts today to discuss your project and receive a personalized bathroom layout plan!